Installation Instructions
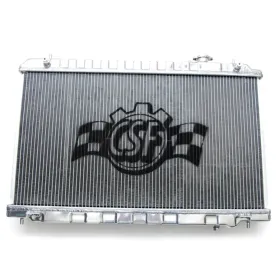
Installation Instructions: CSF 370Z/G37/Q60 1-Row Aluminum High Performance Radiator – Auto
CSF 370Z/G37/Q60 1-Row Aluminum High Performance Radiator – Auto
Installing the CSF 370Z/G37/Q60 1-Row Aluminum High-Performance Radiator – Auto requires some mechanical knowledge and basic tools. Always follow the manufacturer’s installation instructions specific to your vehicle model. Here is a general guide to help you with the process:
Tools Needed:
- Socket and ratchet set
- Screwdrivers
- Pliers
- Hose clamp pliers (optional)
- Drain pan
- Coolant (make sure it’s compatible with your vehicle)
Step-by-Step Installation:
- Prepare Your Vehicle:
- Park your vehicle on a level surface and allow the engine to cool down completely.
- Disconnect the negative terminal of the vehicle’s battery for safety.
- Drain the Coolant:
- Place a drain pan under the radiator drain plug or petcock to catch the coolant.
- Loosen the drain plug or open the petcock to drain the coolant from the radiator. Dispose of the used coolant properly according to local regulations.
- Remove the Old Radiator:
- Start by disconnecting the upper and lower radiator hoses. Use hose clamp pliers (if available) to remove the hose clamps and gently twist and pull the hoses off the radiator fittings.
- Disconnect any electrical connections or sensors attached to the radiator.
- Remove the mounting brackets or bolts securing the radiator to the vehicle frame.
- Carefully lift the old radiator out of the engine bay, making sure not to damage any components.
- Prepare the New Radiator:
- Before installing the new radiator, check its fitment and compare it to the OEM radiator to ensure they match.
- Transfer any necessary components (sensors, brackets, etc.) from the old radiator to the new one.
Install the New Radiator:
- Position the new radiator in place and secure it with the mounting brackets or bolts. Make sure it sits properly in the radiator support.
- Reconnect Hoses and Electrical Connections:
- Reattach the upper and lower radiator hoses to the corresponding fittings on the new radiator. Use new hose clamps if necessary.
- Reconnect any electrical connections or sensors that were detached during the removal process.
- Refill Coolant:
- Follow your vehicle’s manufacturer guidelines to refill the cooling system with the appropriate type and amount of coolant. Make sure to burp any air bubbles from the system.
- Check for Leaks and Proper Fitment:
- Start the engine and let it idle while checking for coolant leaks. Inspect all connections, hoses, and fittings for any signs of leakage.
- Monitor the engine temperature to ensure it stays within the normal operating range.
- Final Checks:
- Recheck all connections, hoses, and electrical connections to ensure everything is secure.
- Double-check the radiator’s fitment and make sure it sits properly in the engine bay.
- Reconnect the Battery:
- Once you’ve completed the installation and confirmed everything is working correctly, reconnect the negative terminal of the vehicle’s battery.
Remember, proper installation is essential for optimal radiator performance and engine cooling. If you’re unsure about any step or lack the necessary tools, it’s best to seek professional assistance from a qualified mechanic or automotive technician.


