


Installation Instructions
Installation Instructions: ISR Performance HGC Long Tube Headers
Jul
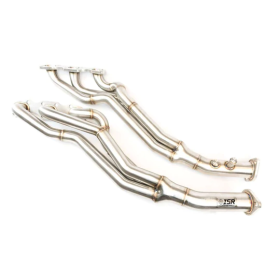
ISR Performance HGC Long Tube Headers
Installing the ISR Performance HGC Long Tube Headers requires intermediate to advanced automotive knowledge and tools. It is essential to follow the manufacturer’s specific instructions provided with the headers for accurate and safe installation. Additionally, if you are not experienced with exhaust system installations, it is recommended to seek the assistance of a professional mechanic or automotive specialist. The following steps provide a general overview of the installation process:
Tools Needed:
- Car jack and jack stands or ramps
- Socket set
- Wrench set
- Torque wrench
- Penetrating oil (to loosen rusted bolts)
- Safety goggles and gloves
- Engine hoist or support beam (if needed)
Installation Steps:
- Safety Precautions: Park your vehicle on a flat and level surface, engage the parking brake, and ensure the engine is cool before beginning the installation. Safety goggles and gloves are recommended during the installation process.
- Raise the Vehicle: Use a car jack and jack stands or ramps to lift the front of the vehicle off the ground, providing enough space to work underneath.
- Remove the Old Exhaust Manifold: Start by disconnecting the negative terminal of the vehicle’s battery to prevent any electrical mishaps. Then, unbolt and remove the factory exhaust manifold from the engine. This may involve removing heat shields, oxygen sensors, and other components.
- Prepare the ISR Long Tube Headers: Before installing the new headers, check that all necessary components are included, and ensure the headers are properly aligned for installation.
- Install the ISR Long Tube Headers: Carefully lift the ISR Long Tube Headers into position, aligning them with the engine’s exhaust ports. Use new hardware if provided and hand-tighten the bolts to hold the headers in place.
- Tighten Bolts and Nuts:. Gradually tighten the header bolts and nuts, working in a crisscross pattern to ensure even pressure. Use a torque wrench to tighten the bolts to the manufacturer’s recommended torque specifications.
- Reconnect Oxygen Sensors: Reinstall any oxygen sensors removed during the old exhaust manifold removal. Make sure they are properly connected to the headers.
Check Clearance and Alignment:. Ensure that the headers have enough clearance from the engine, chassis, and other vehicle components. Also, check that the headers are precisely aligned for proper fitment.
- Recheck Everything:. Once the headers are securely in place, double-check all connections, bolts, and alignment to ensure everything is correctly installed.
- Lower the Vehicle: Carefully lower the vehicle back to the ground using the car jack and jack stands or ramps.
- Test the Exhaust System: Start the engine and inspect for any exhaust leaks or unusual noises. Listen for any rattling or vibrations that might indicate improper installation.
- Professional Tune (Optional): For the best performance gains, consider getting a professional tune to optimize the vehicle’s engine and exhaust system after installing the headers.
Always follow the manufacturer’s specific instructions and guidelines provided with the headers for the safest and most effective installation process. If you are unsure about any aspect of the installation, it is recommended to seek the assistance of a professional mechanic or automotive specialist.