Installation Instructions, Nissan
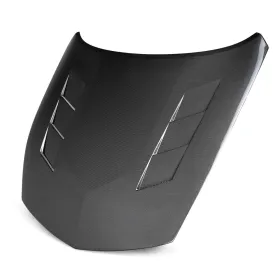
Installation Instruction: Seibon NISSAN Z TS-STYLE CARBON FIBER HOOD
Seibon NISSAN Z TS-STYLE CARBON FIBER HOOD
Here is a general outline of the installation process:
- Start by ensuring the vehicle is parked on a level surface and the engine is cool.
- Open the stock hood of your Nissan Z and carefully prop it open with a suitable support rod to ensure it remains secure during the installation process.
- Inspect the Seibon TS-Style Carbon Fiber Hood to ensure it is in good condition. All necessary hardware and accessories are included.
- Remove any components or accessories attached to the stock hood that need to be transferred to the Seibon carbon fiber hood. This may include hood latches, hinges, gas struts, and hood insulation.
- With the help of an assistant, carefully lift the Seibon carbon fiber hood and align it with the stock hood mounting points. Ensure it is centered and sits flush with the body of the vehicle.
- Begin by loosely installing the hood hinges and any other hardware provided by Seibon. Avoid tightening them fully at this stage to allow for adjustments.
- Check the alignment of the Seibon hood with the rest of the body panels. Make any necessary adjustments by loosening and repositioning the hardware.
- Once satisfied with the alignment, proceed to tighten the hood hinges and other hardware. Following the torque specifications provided by Seibon.
- Reinstall any transferred components or accessories onto the Seibon hood, such as hood latches, gas struts, and hood insulation.
- Carefully close the Seibon carbon fiber hood, ensuring that it latches securely and functions properly.
Please note that this is a general overview, and the actual installation steps but vary depending on the specific Seibon TS-Style Carbon Fiber Hood model and the unique characteristics of your vehicle. Always consult the provided installation instructions for accurate and detailed guidance.


