


Installation Instructions
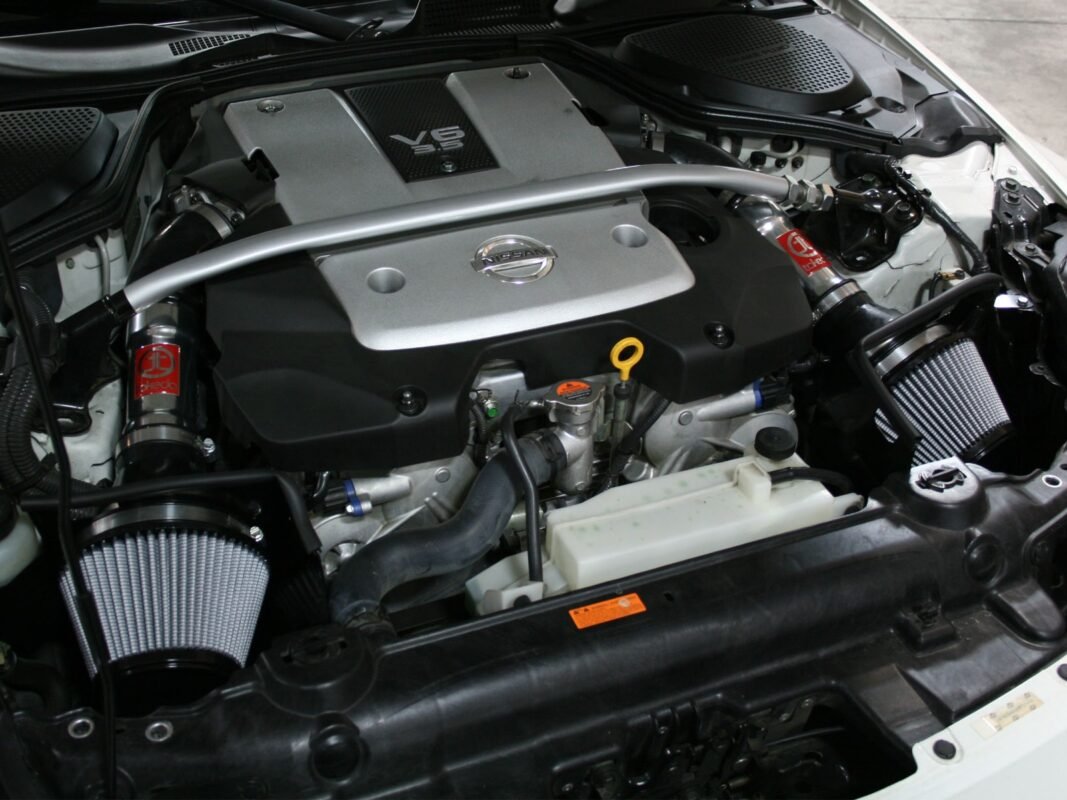
Installation Instructions: Takeda Stage-2 Cold Air Intake System with Pro DRY S Filter Media
Jul
Installation Instructions: Takeda Stage-2 Cold Air Intake System with Pro DRY S Filter Media
Installing the Takeda Stage-2 Cold Air Intake System with Pro DRY S Filter Media is a straightforward process that can be completed with basic tools. Follow these step-by-step instructions to ensure a successful installation:
Note: Before beginning the installation, make sure the engine is cool and turned off. It’s also a good idea to disconnect the negative terminal of the battery to prevent any electrical mishaps.
Tools Required:
Socket wrench set
Screwdriver (flathead and Phillips head)
Pliers
Allen wrenches
Torque wrench
Rubber gloves (optional)
Step 1: Preparation
Open the hood and locate the factory air intake system.
Carefully remove any engine covers, intake ducts, or accessories that obstruct access to the factory intake system.
Familiarize yourself with the components of the Takeda Stage-2 Cold Air Intake System. Ensure that all necessary parts are included in the package.
Step 2: Removal of Factory Intake System
Loosen and remove the clamps securing the intake tube to the throttle body and airbox using a socket wrench.
Carefully disconnect any electrical connectors or hoses attached to the factory airbox.
Remove the factory airbox and intake tube from the engine bay. Be cautious not to damage any surrounding components.
Step 3: Installing the Takeda Stage-2 Cold Air Intake System
Take the Takeda heat shield and position it in the engine bay, ensuring a secure fit.
Insert the Takeda intake tube into the heat shield, aligning it with the throttle body.
Tighten the provided clamps using a socket wrench to secure the intake tube to the throttle body and heat shield.
Attach the Pro DRY S filter to the end of the intake tube, ensuring a snug fit. Secure it using the provided clamp.
Connect any electrical connectors or hoses that were previously disconnected from the factory airbox.
Step 4: Finalizing the Installation
Double-check all connections and ensure that everything is securely fastened.
Reinstall any engine covers, intake ducts, or accessories that were removed earlier.
Reconnect the negative terminal of the battery if it was disconnected during the installation.
Step 5: Post-Installation Checks
Start the engine and let it idle for a few minutes to ensure everything is functioning correctly.
Inspect the installation for any leaks, loose connections, or abnormal sounds.
If everything appears to be in order, take your vehicle for a test drive to experience the enhanced performance of the Takeda Stage-2 Cold Air Intake System.
Note: It’s recommended to refer to the detailed installation instructions provided by the manufacturer for your specific vehicle model, as some steps may vary depending on the make and model.