


Installation Instructions
Installation Instruction: Nissan 370Z Exhaust – Motordyne ShockWave TDX2
18
Jul
Jul
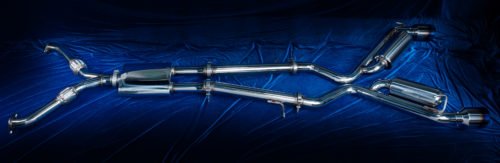
Nissan 370Z Exhaust – Motordyne ShockWave TDX2
I recommend consulting the specific installation manual provided by Motordyne or seeking assistance from a professional mechanic or automotive specialist. Here is a general outline of the installation process:
- Ensure the vehicle is parked on a level surface. Also make sure exhaust is cool before installation.
- Safely lift the Nissan 370Z using a jack and securely support it with jack stands. Make sure to follow proper safety procedures.
- Locate the stock exhaust system on the Nissan 370Z. So inspect the components that need to be removed and This typically includes the stock mufflers, resonators, and exhaust piping.
- Begin by removing any bolts or clamps connecting the stock exhaust components. It may be necessary to use penetrating oil to loosen any rusted or stubborn connections.
- Carefully remove the stock exhaust components, starting from the rear of the vehicle and working your way towards the front. Take note of the orientation and positioning of the removed components for reference during installation.
- With the stock exhaust removed, inspect the Motordyne ShockWave TDX2 Exhaust components.
- Begin the installation by attaching the Motordyne ShockWave TDX2 Exhaust components in the reverse order of removal. Start from the front of the vehicle and work your way towards the rear, connecting the exhaust piping, resonators, and mufflers according to the provided instructions.
- Use the appropriate bolts, clamps, or other hardware provided by Motordyne to secure the exhaust components in place.
- Double-check all connections and make sure there are no gaps or leaks in the exhaust system.
- Lower the vehicle back to the ground and start the engine. Listen for any unusual sounds or leaks, and inspect the exhaust system for proper fitment and alignment.